Bob Vila, a home improvement expert and known host of TV shows which run along the same theme, wrote a blog for Zillow as he observes that new homeowners may quickly learn an expensive lesson - that a handyman costs money and that running a list of home fix-its adds up quickly.
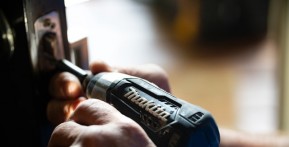
He assures fresh do-it-yourselfers (DIY-ers) that basic home upgrades and fixes need not require a trunk-full of tools as it only needs minimal investment in time and equipment. He adds that transforming your space into something that will reflect your personal taste can be simple and rewarding. He then suggests three home projects which even new DIY-ers can master.
1. Creation of open storage with floating shelves
According to the home improvement guru, lustrous open shelving is not only fashionable, but functional as well. Wall shelves are some of the trendiest additions in the homes of today's DIY decorators.
Steps:
- Determine the composition of your walls by listening to its sound when you tap it. If the sound is hollow it's most likely drywall, if the sound is solid, it could be plaster.
- For either type, attach the shelf brackets to a wall stud, which can be found using a stud finder. If you can't, affix anchors - hollow ones for plaster walls and butterfly or toggle for drywall.
- Measure and mark spaces, for both ends of the shelf and across the wall, where you want to place the shelf.
- Drill initial holes for the anchors and insert them according to the instructions on the package. Align the bracket with the anchor-filled initial holes and mount with a regular screwdriver.
- Top with a simple shelf- wood, glass or metal.
2. Enhancement of energy efficiency and privacy with the use of window film
While a bright and sunny space is nice, having too much of natural light can fade upholstery and rugs over time. More importantly, it can trigger skyrocketing air conditioning bills, especially during summer. A window film is the answer to these.
. Steps:
- Spray both the film and the inside surface of the window with a soapy solution. Stick the film to the window glass and cut around the border, leaving around 1/16 inch between the film and the window frame.
- Smooth out bubbles in the film using a squeegee and let it dry completely. After a few days, you can clean it with a soft cloth and non-abrasive cleaner.
3. Brightening the room with new light fixtures
By changing your old "builder's special" light fixtures for something more stylish, perhaps a modern chandelier or a stylish pendant lighting, you can easily change the mood of your place even without an electrician around.
Steps:
- Turn off the lights and the power to the room through the main breaker panel. Detach the old fixture cover, remove wire connectors and untwist the wires from the main power wires. Take down the base or trim.
- With the new fixture in hand, follow the manufacturer's instructions on how to match its wires to the main wires installed.
- Remove the protective coating from the end of the light's wires with a wire stripper. Wrap each uncovered wire around the metal end of its match. Screw on the connectors and attach the fixture's grounding wire (commonly green) to the grounding screw.
- Fold all wiring back in the electrical box and attach the fixture base or canopy with the new light's included hardware.
- After screwing the prescribed bulbs, turn on the circuit in your electrical panel. Turn on the switch. Once it is working properly, attach the trim and cover to your new fixture.